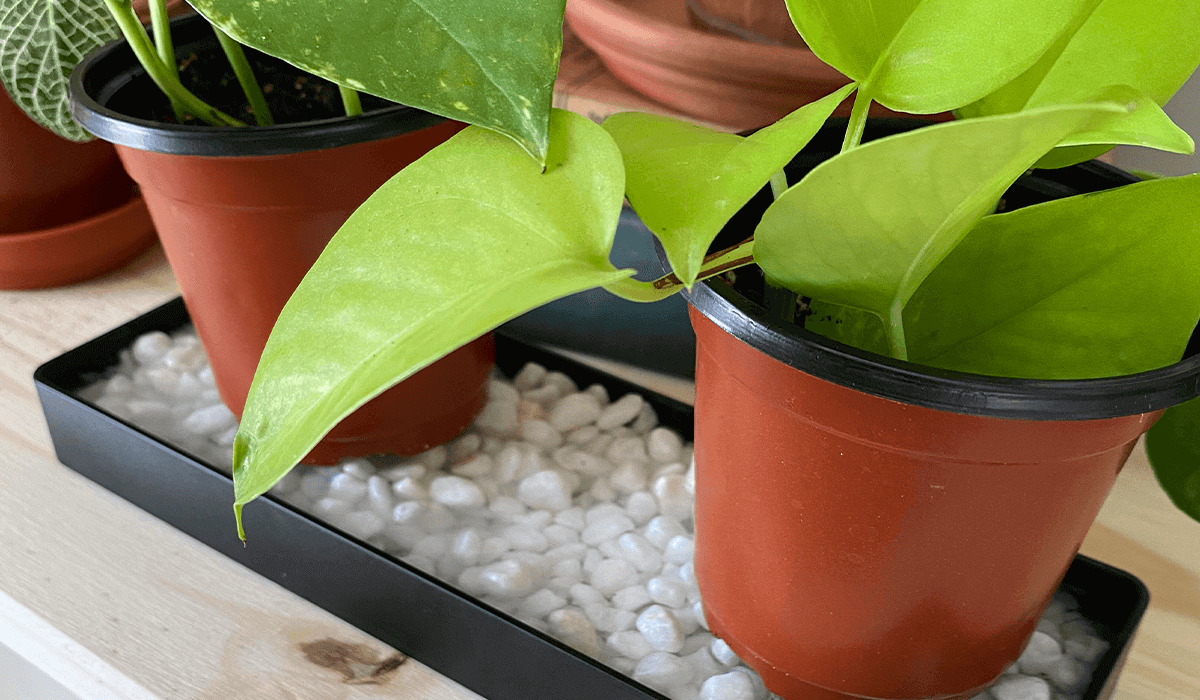
As the season changes, we see a number of our plants struggling with humidity. A great way to give your plants some extra moisture in the air is by creating a simple pebble tray. These are easy and inexpensive to build. It ultimately comes down to a bunch of rocks sitting in a wet tray.
So, before you hit buy on that amazon purchase for an industrial humidifier, or move to the rainforest, try placing a pebble tray just below your plant. Making your own pebble tray is impossible to mess up and incredibly easy to make.
Steps to Building your Pebble Tray
- Find a shallow tray that is general the same height as your pebble substrate you choose. This can be a dish tray, an old plate or even a cooking tray. Basically, anything that doesn’t leak, or allow water to pass through it. You can find a plate that you no longer use or run to the thrift store to find a cheap option.
- Fill the tray full of pebbles or rocks.
- Place plants on pebbles, and monitor the level of water weekly.
It’s as easy as 1, 2, 3!

Pebble or Rock Choice
Choose rocks or pebbles that aesthetically work with your space. You can purchase decorative pebbles (or beads) from a craft store or go to your nearest forest or beach to source the peddles yourself. It’s best to find smooth pebbles and to avoid sharp gravel that could scratch your fancy, old, cheap tray. Also we just like the Zen look of the smooth pebbles anyway.
Water level
Fill the tray with water making sure that the tops of the pebbles stick out just over the water. Monitor the water level weekly to ensure that your planter, is not sitting in water.
A few additional ways to inject more humidity in your space is to use a humidifier or mister. However, the pebble tray method is an inexpensive trick that works. Make sure you do your research on your plants to ensure that you’re providing the proper atmosphere for them to thrive.
A pebble tray can be useful for your plants, aesthetic for your home, and cheap for your wallet. Go out and give it a try!

